If you’re new to bullet journaling, you’re in the right place! In this post, we’re getting into how a bullet journal actually works, so that you can set yours up and get started with the basics.
Ready to get going?
To kick things off, I always recommend checking out Ryder Carroll’s YouTube series to see the set-up in action: How to Bullet Journal. I mentioned it in my earlier post (Bullet Journaling Basics: What It Is & What You Really Need to Start One), but I thought it worth repeating here since it’s wonderfully concise and easy to follow.
Of course, setting it up is one thing, but actually using it is another.
The system is truly simple at its core, but if you’re not used to it, it can be intimidating to conceptualize how it’ll work in practice. So in this post, we’ll go over the very basics – the key spreads, and how to use them – and make your bullet journal a seamless part of your day-to-day.
Rapid logging: the core methodology
If you hear “journaling” and dread the idea of sitting there writing out complete sentences, you’ll love rapid logging, the foundational journaling technique that makes the bullet journal method work.
Rapid logging is a quick, shorthand method of journaling that uses “bullets” (or symbols) to denote what you’re writing:
• indicates a task
– indicates a note
o indicates an event
(Bullets also have states, you can learn about them here: Beyond Basic Bullets: Exploring Bullet States)
You can rapid log anything: a task you’ve just remembered, an “event” that just happened, a note about how you’re feeling, and so on. Your journal entries might look like this:
(beginning of day)
June 28, 2025
o Hot Yoga 7am (first class!)
• Check-in with team RE project A
• Stop for milk on way home
(end of day)
June 28, 2025
o Hot Yoga 7am (first class!)
x Check-in with team RE project A
x Stop for milk on way home
– Hot Yoga is not for me
– Cheryl loved my proposal, I’m pumped
• Book RMT @ place Mark recommended
o Celebrated Maddison’s 10 year workaversary!
Continue rapid logging throughout the day (or whenever you get the chance for a quick mental unload).
Using rapid logging helps you remember more: it’s so quick to use that you can capture things instantly as they arise. You’ll also free up mental bandwidth – once it’s been logged, you can forget about it, and get back to the task at hand!
Don’t worry – you will revisit it later at a convenient time and do something with it.
(And if you do want to do some long-form journaling later, don’t worry – there’s space for that, too!)
The key spreads that make it work
The pages that make up your bullet journal are called spreads. A spread is one or more pages that serve a specific purpose, and they have their own layout to facilitate that.
There are five foundational spreads you can start with to get used to the system:
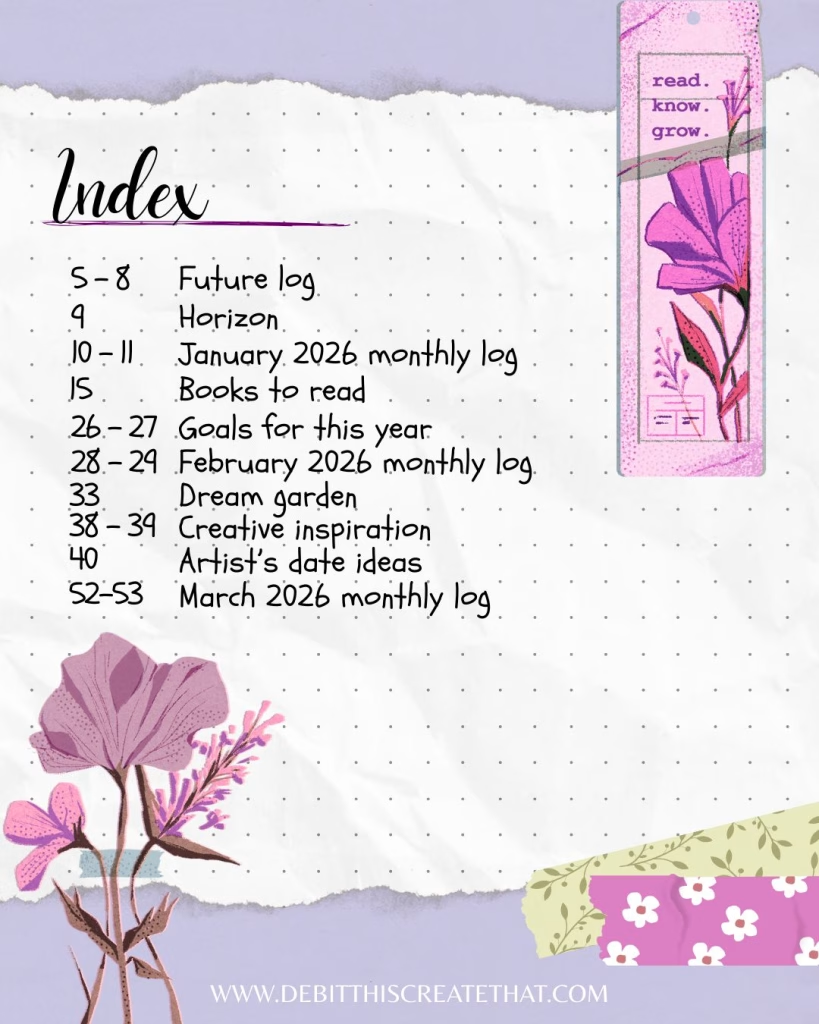
1. Index
The index is a table of contents for your BuJo that you build as you go.
Save 2-4 pages in the front of your notebook to create your own index (unless your notebook already comes with a blank one). Every time you create a new spread in your journal, you flip back to the Index and add the page number and spread title or topic.
Tip: If your journal doesn’t come with page numbers, you can add them in the top or bottom corners each time you start a new page, and then flip to your index and add them there, too.
I don’t index my daily logs, but everything else usually gets a spot on my table of contents so that I can refer back to it later. (They are especially handy when you’re going back through journals from years ago!)
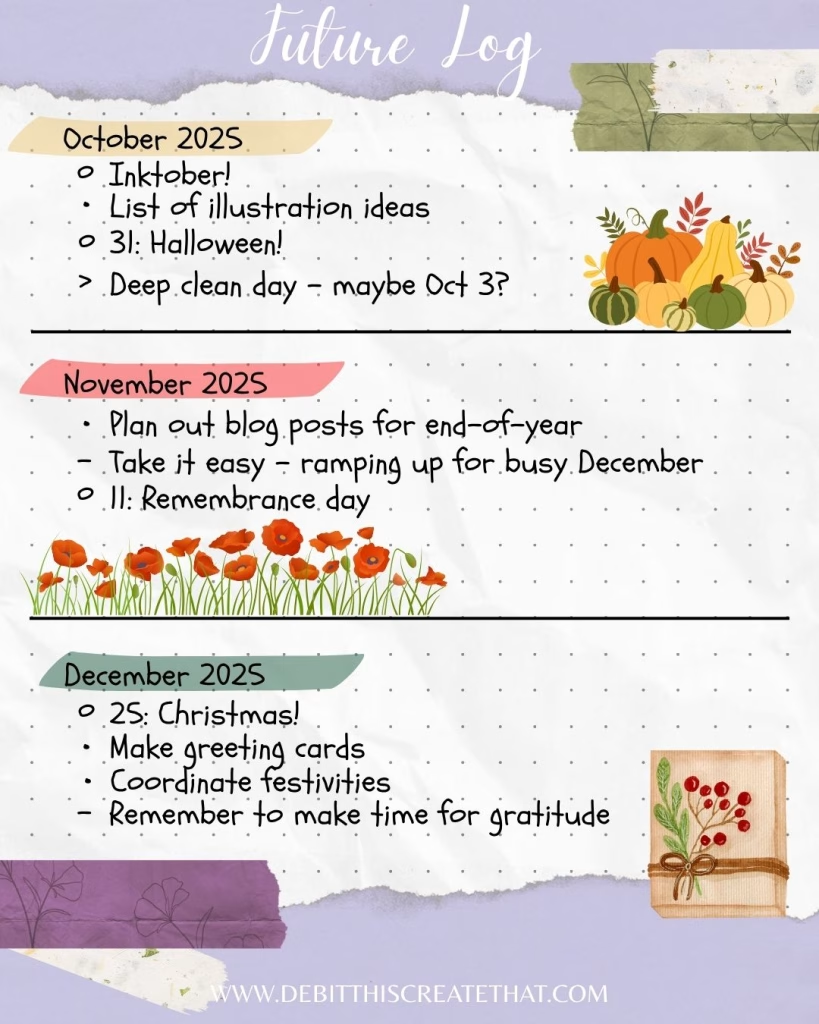
2. Future log
This is your next 6 months at a glance, intended to capture the big events to come.
Divide the next 2-4 pages following your index into 6 months. Ryder’s version is simple and practical, but you can get creative with the layout! I’ve tried many of the layouts found here (but I still go back to the simple 6-month version).
The future log is great for getting a bird’s eye view of the months to come. You’ll know at a glance which are jam-packed, and which have room to breathe so that you can plan and prepare accordingly.
A couple tips to make the future log work for you:
- The future log is traditionally used to log future events, but you can also add tasks or notes if they’re relevant to a future month. Things like gathering tax materials in March or setting goals for a Mindful May, for example.
- 6 months is standard, but if you are only using your BuJo minimally, you might actually stay in the same notebook for an entire year. (This worked for me when I was on maternity leave!)
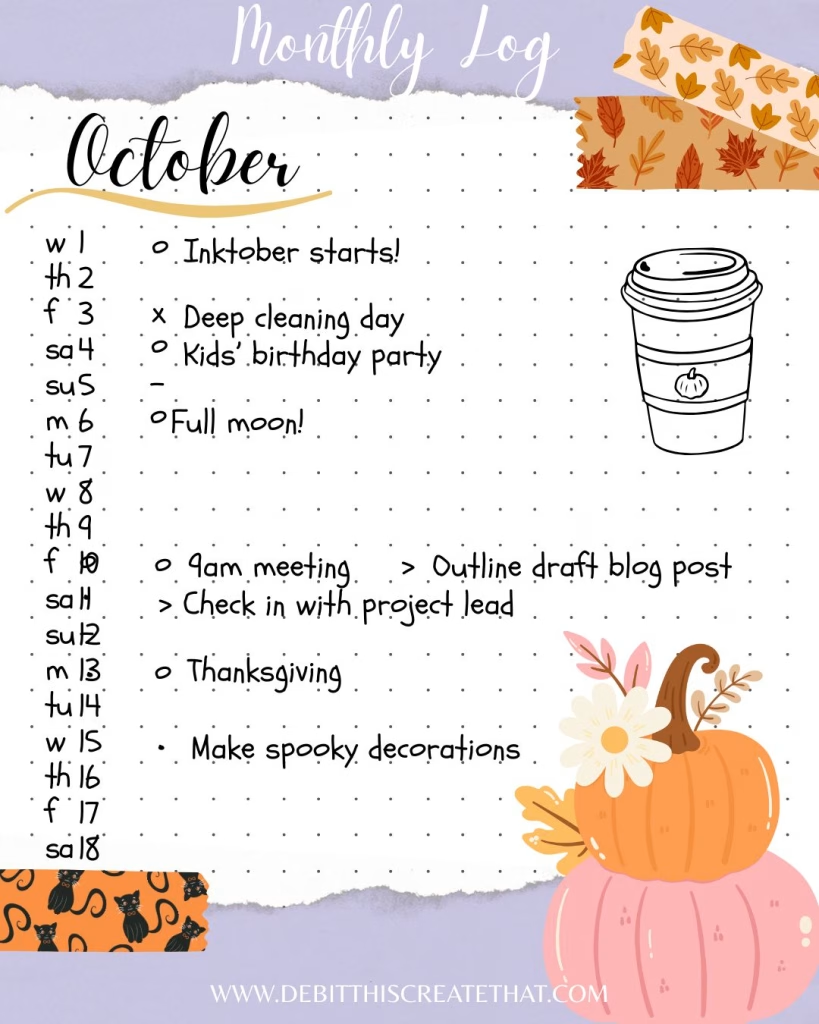
3. Monthly log
This is a spread for the month you’re currently in, and it usually includes a simple calendar and task list.
Check out Ryder’s original spread to start – it’s not the most glamorous, but for me it was the most effective layout (and I’ve tried many).
How do you populate the monthly log? You can start by checking the entries for that month in the future log, and copying them down into that month.
It’s not just a copy-and-paste process, though. Is what you wrote in the future log still important, meaningful, or relevant? If it is, it goes in your monthly log.
If not, you can leave it (or satisfyingly strike it out). This is how the bullet journal becomes a mindfulness practice: you are intentionally selecting what you will bring with you into the month, and where your focus will be.
Tips to make the most of your monthly log:
- If your notebook comes with more than one ribbon bookmark, keep one here since you’ll refer back to it each day for your daily log.
- Totally optional, but if you’re looking for ideas to get creative in your BuJo, a cover page for each month is a fun addition!
- This is also a great space to write out goals or affirmations for the month so that you’ll see them whenever you refer to it, which might be quite frequently.
- If you like habit trackers but you’re short on time, try adding a couple of columns for them in the monthly log (rather than recreating them daily).
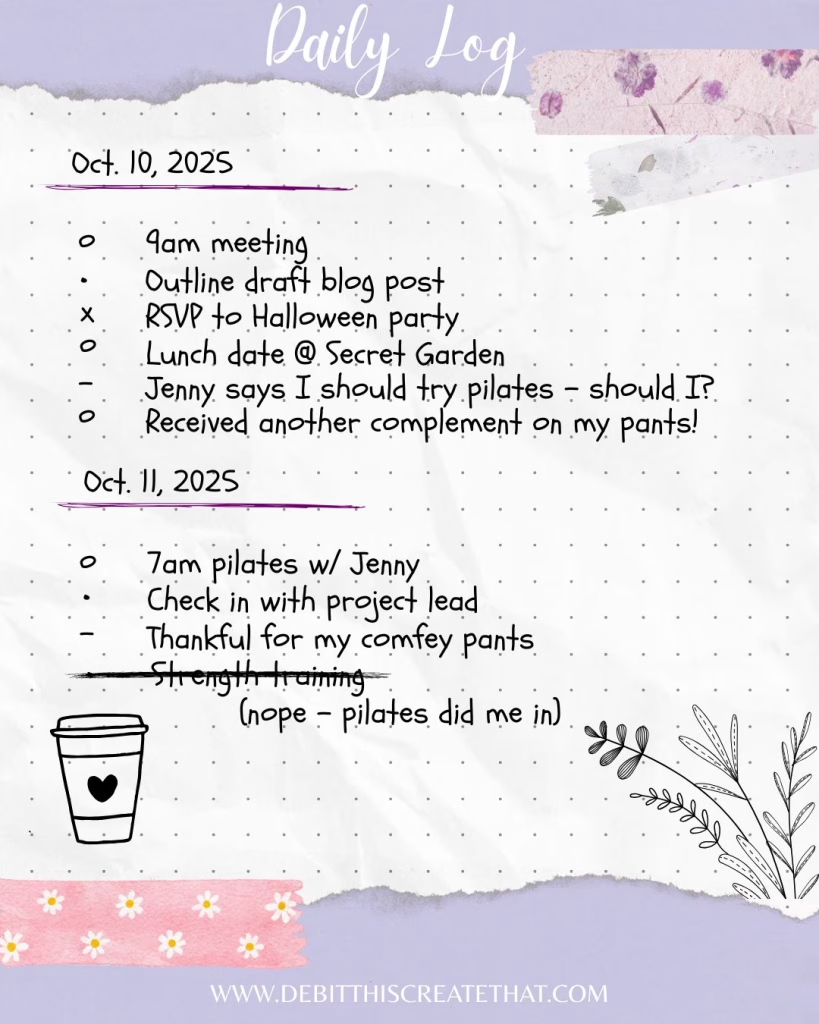
4. Daily log
This is where your rapid logging happens! The daily log is your to-do list, your mini journal entries, and your daily events.
How do you set it up? You flip to the next available page, write today’s date at the top, and start logging!
Typically you’d take a few mindful minutes in the morning to review your monthly log and copy over anything relevant to today. Just as when you set up your monthly log, you’ll be intentionally copying over only what is relevant or essential for the day.
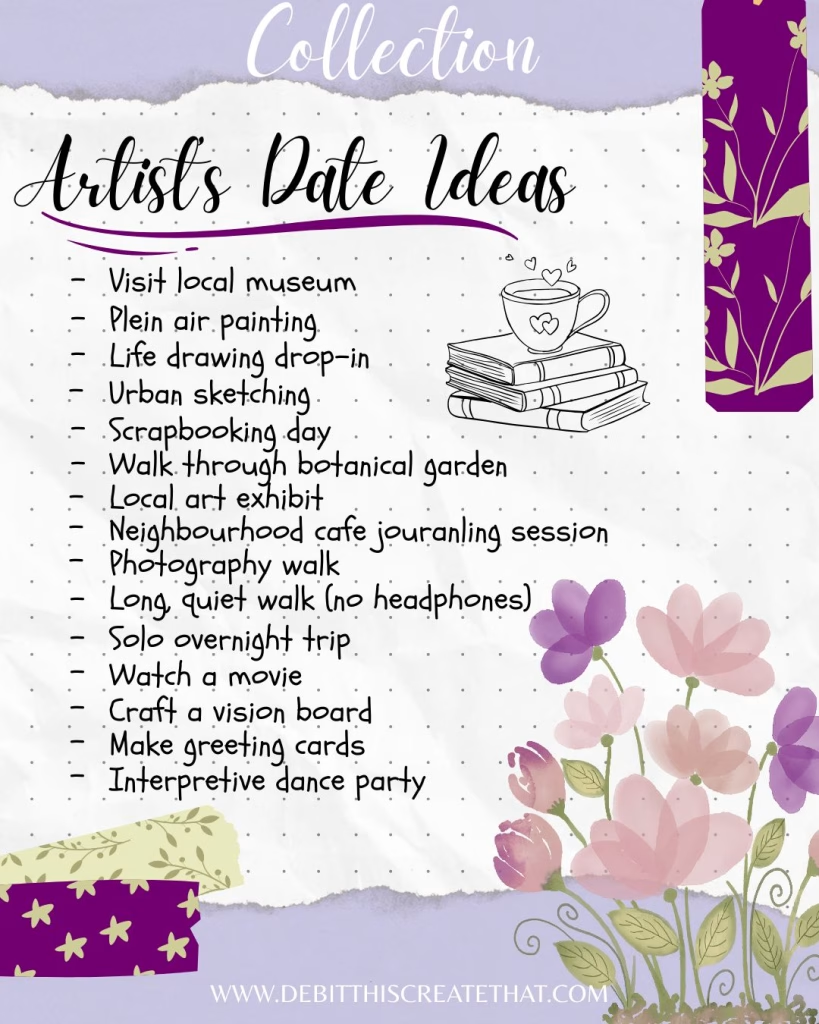
5. Collections
A collection is a spread used to collect related information, and you can start one any time that you need one.
These are optional, but they do add a ton of value to the bullet journaling system.
You could pre-plan one, or you might decide that you’ve rapid logged so many related tasks or notes that you want to continue collecting them all in one place. They can be anything you want them to be – get creative!
Collection ideas:
- Goals for the year ahead
- Art project ideas
- Blog post ideas
- Book note spreads (a dedicated spread to take notes from the book you’re reading)
- To-read and to-watch lists for books, movies, or shows
- Quote spreads (list your favourites, or take one and create a decorative page for it)
- Dopamine menu (feel-good activities categorized by the amount of time you can do them in)
- Training schedules (eg. a running pace/distance schedule to prepare for a race)
- How-to’s and instructions
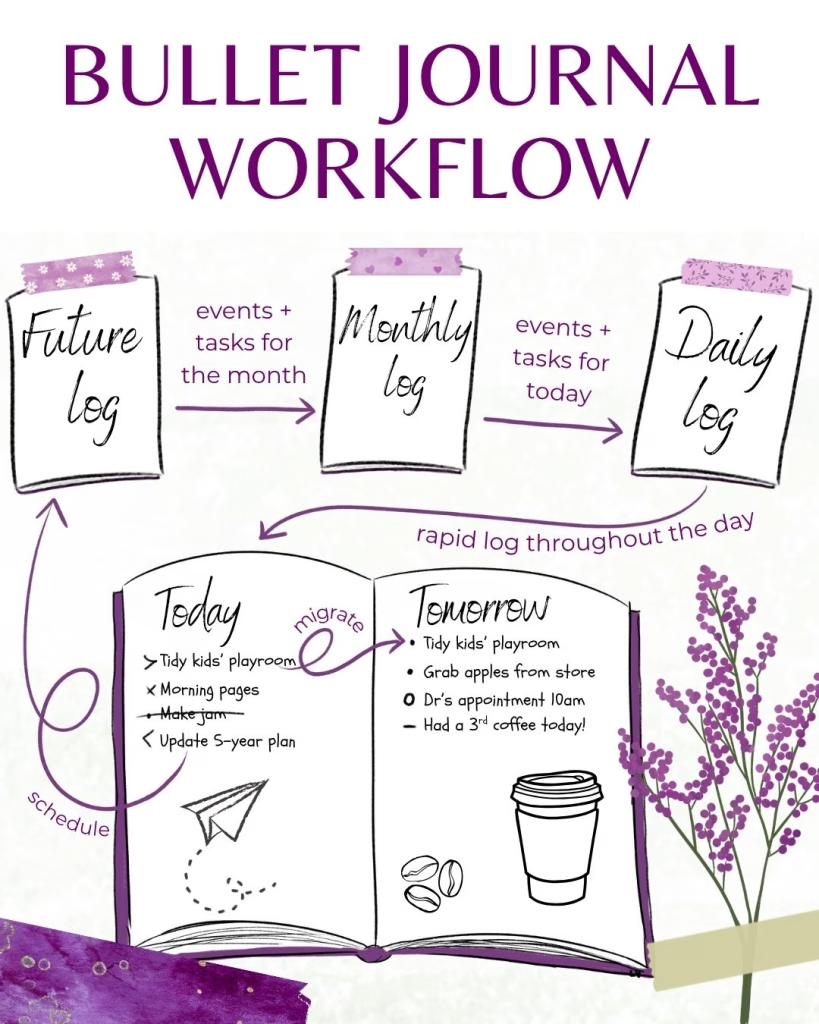
How it all works together
Where the BuJo really shines is the way that you use it.
Here’s the high-level flow:
- Populate the Future Log with any events or important tasks that you know are coming up in specific months.
- Set up your Monthly Log at the start of each month by checking that month in your Future Log and migrating what matters into the Monthly Log.
- Start your Daily Log each day by writing today’s date at the top and migrating anything relevant to the day from your Monthly Log. Then you can rapid log anything else that you need to. The start of the day is a great time to prioritize tasks, write reminders, etc.. You can continue to populate your daily log throughout the day.
- Review your Daily Log at the end of the day, cross off any completed tasks, and rapid log any final things you’d like to capture. As part of this reflection, you might decide to start a Collection on the next page (for example, if you see you’ve made a lot of entries related to planning your garden, it might be time for a Garden Planning spread!).
The system might feel clunky at first, but this feeling is normal when you’re learning anything, really. You might be surprised how quickly it becomes second nature!
Ready to get started?
There’s little more refreshing than opening a brand new journal with a cup of tea and a bit of time to myself to set up a bullet journal. Grab your notebook, and create your Index, Future Log, Monthly Log, and a Daily Log!
Who knows where it will lead?
If that all seems too overwhelming, you might even try just experimenting with a Daily Log, and see how the rapid logging technique sits with you. It might feel like a “glorified task list” at first, but over time you may find that you capture some really insightful thoughts and bits of information!
Want a printout to try a little daily rapid logging? Grab the free one-pager: 5 Minute Reset, which includes a dot-grid area and rapid logging key.
Give it some time, and then reflect on what’s working for you, and what feels clunky. You might find that there are some creative solutions to certain clunkiness out there (or you can come up with your own).
My journals have grown a ton over the years as I experimented with new methods, new solutions, and new collections!
They’ve also been instrumental to my creative journey giving me a framework to capture my thoughts and inspiration, and a space to mull over them in a way that remains permanent, rather than getting lost to the many distractions of the digital world.
I hope your bullet journaling experience is just as enriching, grounding, and inviting!
If you have any questions on how to make bullet journaling work for you, I would love to hear from you!
Until then, wishing you time and space to create!
Where to next?
- For more Bullet Journaling Basics, start here!
- Want monthly creative inspiration and encouragement direct to your inbox? Join the newsletter!


